There will be a test on Turing, Ch. 6 next Friday, Dec. 19.
It is not intended to be challenging. There will be plenty of simple, straightforward
questions to be answered on paper, enough of them so that anyone who has studied the notes can earn a good overall mark on the test. Some of the questions will even be True or False! How easy is that?
Whether you find writing programs in Turing easy or hard, you do of course have to learn what is in your notes. That's obvious, right? It's not many pages to study. Check your answers against the .pdf file in the Pickup Folder.
Also on the test, in addition to the questions answered on paper, will be a few questions requiring you to write short programs in Turing. At least two of them are meant to be easy. They will simply ask you to write something like the programs in
-- the content of the chapter, or
-- the "Practice Exercises" in the Pickup Folder, or
-- the easier questions at the back of the chapter.
By the way, we will look at the questions at the end of the chapter in class next week and you will be give model solutions for all of them.
There will probably be one programming question a little more challenging, just so some people don't get completely bored.
DO NOT BE ABSENT. Yes, Friday is the last day before the holidays, but the class did not want the test on Wednesday, so it was postponed until Friday.
Friday, December 12, 2008
Sunday, November 23, 2008
Turing, Ch. 6 - repetition (loops)
In Chapter 6 you learn how to create repetition in a Turing program.
Remember the repetition you created in Scratch using the "forever block"? In more traditional programming languages, such as Turing, a similar structure is known as an infinite loop. That is, it continues without stopping. We use infinite loops in later chapters with graphics to create endless patterns and colours on the screen.
More often you will want some sort of loop you can control not to go on forever. We will look at two:
-- the conditional loop, which ends when some variable meets a certain condition, such as a number becoming more than 100
-- the counted loop, which continues only the number of times you want it to.
Wednesday, November 19, 2008
Fri., Nov. 21 -- Turing again
You should have your Scratch project completed by the end of class on Thursday. Be sure it is named after yourself and ends with the .sb extension. (If your name is Barack Obama, your file would be named BarackO.sb). Leave a copy in the Dropoff Folder (Schreiber / TIK201)
On Friday bring your Turing textbook. We will do a quick review of Chapters 4-5, then begin Chapter 6: Repetition (Loops).
Wednesday, November 12, 2008
Scratch assignment
You have a handout outlining a Scratch assignment, with a rubric telling you what you need to include in your Scratch project in order to get various marks. A basic mark of 60-70% should be quite easy to get.
Have fun!
You can work on the project for two classes.
Sunday, November 9, 2008
Step 2--
Starting the Scratch 2 video tutorials
Our next step is to begin working with the videos under the heading Video Courses/Scratch 2, where you learn more advanced skills and can begin putting together some very interesting Scratch projects.
You can access these tutorials from the Pickup Folder (click on LearnScratch.htm) or online at http://learnscratch.org/
The file named ScratchLessons_TableofContents.doc in the Pickup Folder lists the topics covered in each video tutorial to help remind you of what is in each video and what skills you should learn. It lists the following topics for the Scratch 2, Unit 1 tutorials. We will begin them soon. (Don't be overwhelmed. They are not really any harder than what you learned already in the Scratch 1 lessons.)
Scratch 2
Unit 1
Lesson 1: Moving and Pointing
• understanding the x and y coordinates for the sprite
• using the go to x, y block to move a sprite
• using the go to mouse-pointer, sprite block to move a sprite
• using the point in direction x block to turn a sprite
• using the point towards block to turn a sprite
Lesson 2: Go and Glide, Changing Positions
• using the go to x, y position block to move a sprite to a certain position on the stage
• going to the mouse or another sprite
• using the change x by block to change the x coordinate of a sprite by a certain number
• using the change y by block to change the y coordinate of a sprite by a certain number
• using the set x to block to set the x coordinate of a sprite to a certain number
• using the set y to block to set the y coordinate of a sprite to a certain number
Lesson 3: Bouncing, Locating the Sprite
• using the if on edge, bounce block so that if the sprite touches one of the edges of the stage, it will change direction
• using the blocks x position, y position and direction to show the current position and direction of the sprite on the stage
• using the current position (x and y) and direction of the sprite in a script – e.g. forever if x position > 100
Lesson 4: Changing Costumes
• the Looks menu
• using the blocks switch to costume and next costume
• associating a sprite with multiple costumes
• the block switch to costume – its options
• creating an animation with the blocks switch to costume and next costume
• changing backgrounds using the switch to background and next background blocks
• importing backgrounds using the Backgrounds tab
• associating multiple backgrounds with a sprite
Lesson 5: Speaking, Thinking and Graphic Effects
• using the blocks say for x secs, think for x secs, say (continuously) and think (continuously)
• creating scripts with the above blocks
• creating graphic effects using the blocks change color effect by, set color effect to and clear graphic effects
• the change color effect by block – its options (color, fisheye, whirl, etc.)
• the clear graphic effects block
• the set effect to block
Lesson 6: Size, Presence and Layers
• using the change size by block to change the size of a sprite
• using the set size to % block to set the size of a sprite
• using the size block to show the sprite’s size on the screen or to include in a script with other blocks
• working with multiple sprites
• using the show block make a sprite appear on the stage
• using the hide block make a sprite disappear from the stage
• copying a script from one sprite to another sprite
• using the go to front block to move a sprite to the front on the stage
• using the go back x layers block to move a sprite back multiple layers

Saturday, November 8, 2008
Step 1--
the Scratch 1 video tutorials (8 easy lessons)
You can access these tutorials from the Pickup Folder (click on LearnScratch.htm) or online at http://learnscratch.org/
The Lessons 1 to 8 (under the heading Video Courses/Scratch 1) are quite easy and many people in the class have already finished all or most of them. Excellent! They enable you to make lots of things happen on the screen.
The file named ScratchLessons_TableofContents.doc in the Pickup Folder lists the topics covered in each video tutorial to help remind you of what is in each video and what skills you should learn. It lists the following topics for the Scratch 1 tutorials. (Don't be overwhelmed. Learn them one at a time, and you will see they are very easy.)
The Scratch 1 topics are:
Lesson 1: Motion and Sound
• the Motion menu
• the block move x steps - move a sprite x positions to the right or to the left
• double-click on a block to move the sprite
• the block play drum for x secs – its options
• create a script (i.e. connect blocks to play them in sequence)
• create a dance
Lesson 2: Repeating Actions
• the Control menu
• the forever block
• the red Stop sign
• the green flag
Lesson 3: Playing with Color
• the Looks menu
• the change color effect by block – its options
• the when key pressed block – its options
Lesson 4: Create Your Own Sprite
• importing a sprite from the built-in collection of sprites
• get a random sprite
• painting a new sprite
Lesson 5: Speaking and Thinking
• the say block
• the say x for y secs block
• the think block
• the think x for y secs block
Lesson 6: Creating Image Effects
• the change effect x by block – its options
Lesson 7: Add Audio
• the Sounds menu
• using sounds recorded by yourself or importing audio files (e.g. mp3 files)
• associating multiple files with a sprite
• the play sound block
Lesson 8: Creating Animations
• the next costume block
• associating costumes with a sprite (using the tab Costumes)
• importing existing costumes or using the graphic editor to create new ones
• associating multiple costumes with each sprite
Thursday, November 6, 2008
Thurs., Nov. 6 - Scratch, Lessons 1 and 2
In our previous lesson we started on Scratch, Lesson 1 (Motion and Sound).
Today we should finish that lesson and go on to Lesson 2 (Repeating Actions).
Scratch - getting started
We'll be learning Scratch using the instructional videos from learnscratch.org.
For the list of lessons, in the Video Courses menu the click on Scratch1. (The files are also in the Pickup Folder, where you click on LearnScratch.htm).
We will be covering one lesson (which might include several videos) per class.
The Pickup Folder also has a subfolder named LessonsfromLearnScratch.org_inWordFormat containing a Word document for each lesson outlining what is covered in the videos. This allows you to keep track of what we are covering without running all the videos.
There is also a subfolder named moreInfo_Scratch with a few files if you feel you need some extra help getting familiar with Scratch. (Scratch is so easy to learn that most people will not need this material.)
You can download your own copy of Scratch to use at home from http://scratch.mit.edu/.
Tuesday, October 28, 2008
Converting Data to Information -- extra knowledge
Some students in class have asked for additional information on several of the topics in this chapter.
SWAP FILE (PAGING FILE)
Swap file
Swap file
What is a swap file?
In Windows what is a swap file?
What is the page file for?
Understanding Windows Vista Paging File Size
Paging - information of a more technical nature
TYPES OF RAM
Types of RAM - from HowStuffWorks.com
Different RAM Types and its uses
Types of RAM and ROM
Types of RAM: How to Identify and their Specifications
FLASH MEMORY
What is flash memory?
How flash memory works
Flash memory - from Wikipedia
Norton, Lesson 7: Transforming Data into Information
Wednesday, October 1, 2008
Ch. 5 exercises
You are now ready to write your first computer programmes!
For the next few classes everyone should be working only on the exercises at the end of Chapter 5.
Easy exercises
#4, 5, 7, 8, 9, 10, 11, 12
Moderately Difficult Exercises
#1, 2, 6, 13 (somewhat long), 14 (somewhat long), 15
More Challenging Exercises
#3
For the next few classes everyone should be working only on the exercises at the end of Chapter 5.
Easy exercises
#4, 5, 7, 8, 9, 10, 11, 12
Moderately Difficult Exercises
#1, 2, 6, 13 (somewhat long), 14 (somewhat long), 15
More Challenging Exercises
#3
Friday, September 26, 2008
Homework before next class - finish notes for Turing Ch. 5
All notes for Chapter 5 (Variables and Constants) should be completed before the start of next class, Tuesday.
If you have not finished your notes for Ch. 5 yet and have to work at home, you may find it easiest to print the questions, then write the answers using pen or pencil.
There will be a homework check at the start of Tuesday's class, and it will form a part of your November report card mark.
During Tuesday's class everyone should be working on the exercises at the end of Chapter 5, writing programs in Turing.
Remember - when you work steadily in class without being distracted, you have less to do for homework.
Fri., Sept. 26 - Guest speakers
Sandy Graham and Dan Brown from the University of Waterloo will visit to present an activity on Data Compression and to talk about the university.
(Actually, Dan Brown came and spoke about what kind of work people do who have a degree in computer science.)
Tuesday, September 23, 2008
Turing, Ch. 5: Variables and Constants
The topic of variables and constants is not difficult, but it's important to learn it well in order to continue with programming.
Work on Chapter 5 the same way you worked on Chapter 4:
• read the chapter carefully
• make notes from the question sheet in the Pickup Folder
• try the programs as you read
• do the exercises at the end of the chapter
- Become familiar with how to declare a variable using var. For example:
var maxTempDay1 : real - Know the three data types -- int, real, string.
- Try to think of a variable as a named memory location, that is, an area of RAM the computer gives a name and waits for it to be given a value.
Work on Chapter 5 the same way you worked on Chapter 4:
• read the chapter carefully
• make notes from the question sheet in the Pickup Folder
• try the programs as you read
• do the exercises at the end of the chapter
Where to get your copy of Turing
To practise programming at home, you need a copy of the Turing program. Because of license restrictions, we can't give it away publicly through a Web link. However, the teacher will show you in class how to download a copy for your home computer.
-------------------------------------------------------.
schools.tdsb.on.ca/jarvisci/turing/turing.zip
-------------------------------------------------------.
-------------------------------------------------------.
schools.tdsb.on.ca/jarvisci/turing/turing.zip
-------------------------------------------------------.
Turing Chapters 2 and 4
Chapter 2: The Turing Environment introduces you to how to use the Turing program. Most of it is familiar to anyone who has used a computer before, so I demonstrated it quickly with the computer and projector. Your assignment is to try the programs on page 55, 57 and 58 #3.
Ch. 4: Simple Programs - In the Pickup Folder there is a file waiting for you entitled "Ch4Put_makingNotes.doc." Copy it to your Home Drive, then read through the chapter and fill in the blanks in the file. When you're done, print the file to have a set of notes for the chapter. As you're working through the chapter, be sure to try all the programs given as examples.
After reading the chapter, making the notes and trying the programs, do the exercises at the end of the chapter -- Questions 1-3 are so simple you might want to just read them, but you should certainly write programs for Questions # 4-10.
Once you are finished with the chapter, you can look at the second file in the Pickup Folder, entitled "Ch04_Selftest.doc." It quizzes you on some of the key points in the chapter. Answers are in the table, but they are white-on-white, so if the keyboard shortcut (Control key and the Plus sign on the numeric keypad) doesn't work, highlight everything in the Answer cell and change the format of the text to black.
Thursday, September 18, 2008
We're studying the Turing programming langues because it's an easy entry to programming.
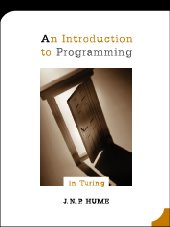
The text book we use is An Introduction to Programming in Turing by J.N.P. Hume (Holt Software Associates Inc.).
Students who are a little familiar with programming languages sometimes ask, "Why are we studying Turing? Why aren't we studying Java or C++ or C# or some other language?" There are a couple of good reasons for choosing Turing.
1. TURING IS SIMPLE TO LEARN
Turing is a good programming language to start with because it's one of the simplest languages to learn. For example, here's how to get Turing to show the words Hello, world! on the screen:
put "Hello, world!"
Simple, huh? The keyword put plus quotation marks around what you want to show on the screen. Neat! Now compare how much 'extra stuff' the language C++ needs to do the same thing:
#include
main()
{
cout << "Hello World!";
return 0;
}
Yikes, yuck! Look at that stuff - the #include, the angle brackets, the parentheses, the semi-colons, blah-blah-blah. With Turing you avoid all that.
So by learning Turing, you learn more more in less time with less pain.
2. TURING PREPARES YOU FOR OTHER LANGUAGES
In the coming years, many of you will go on to study Java or C++ or other languages. Is it a waste to start with Turing? No, not at all. Nearly everything you learn in Turing about variables, loops, selection, case statements, graphics, arrays, and so on is easily transferrable when you study another language.
Thursday, August 28, 2008
Welcome to the TIK course at Jarvis C.I. for 2008-09
Welcome to your first course in computer science!
Right at the beginning, let me say that I'm going to make every effort to see that ALL students pass or, preferably, do much better than pass.
Of course, I do expect you to make a good effort.
We'll start the year with a little background information about computers and how they work from the Norton textbook. It's an excellent textbook with many "pictures that say more than a thousand words." It was published a while ago, in 2000, so a few details have gone out of date, but we'll correct those little problems. Overall it's great.
After the introduction, we begin to write computer programs, which I think is going give you quite a thrill. There's something about writing your own programs, having that much control over the computer - it's very cool!
Whether you get a kick out of it at the beginning or not, later in the year I guarantee you're going to enjoy pixel graphics (Chapter 8 of the Turing textbook), where you create colour and animation and all sorts of razzle-dazzle.
So get ready to enjoy, enjoy, ENJOY!
Subscribe to:
Posts (Atom)